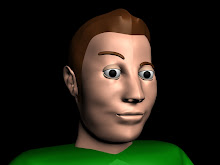
The problem I had now was creating the other half of the face. This was done using a symmetry modifier which meant everything done on the left of the face would be mirrored on the right much like a mirror. This proved very usefull and time saving in the long run.
Friday, 23 October 2009
Stage 6 - Added Symmetry
The problem I had now was creating the other half of the face. This was done using a symmetry modifier which meant everything done on the left of the face would be mirrored on the right much like a mirror. This proved very usefull and time saving in the long run.
Stage 5 - Face Modelling
 After creating the quadrants, I used the side view reference plate as a guide of how far to pull out the verticies of each quadrant. I had a few problems here with the non-connected corners of some of the quadrants which I fixed with the target weld tool.
__
A major problem I had was when I created the original topology, I created lines which ended in the middle of other lines instead of joining at verticies. This created a pinching effect which I corrected with the cut tool and polygon create tool.
Stage 4 - Quadrant Creation
 Stage 4 was creating the splines for the face in order to make it 3D. To do this I used the tutorial provided and using the spline line tool, followed the face topology to create quadrants which had a nice flow, following all the muscle groups in the face.
Stage 3 - Reference Plates
 The next stage was the integration of the images into 3D Max in order to create reference plates in which the head could be built from. This was quite a staight forward process when following the turorials provided.
Stage 2 - Topology Complete
 This is the next step of the face topology, the red lines have been drawn on to indicate the final positions of the quadrants in the face. In the tutorial it didn't say to create the quadrants for the side view onto the photograph, but due to my limited knowledge on 3D Max, I decided to include the topology for added help in the future.
Stage 1 - Face Topology
 The first stage was taking photographs of your face from the front and side angles, as you can see from the picture (left) my ears didn't line up horizontally, which gave me problems later in the creation.
__
In Photoshop I drew the basic lines of Topology onto the image to start breaking the face up into quadrants in order to create the face in 3D.
Face Creation 2009
The brief given was to create your own face in 3D Studio Max and model it into a life like head complete with UVW Mapping to include skin texture too. With my limited knowledge of 3D MAx, I must admit I was a little worried at first but I like a challenge so I got started. I decided to use Version 8 of 3D Studio Max as it was the copy I had available at home and am more familiar with.
Subscribe to:
Posts (Atom)